Two of my favorite podcasters, Scott Hanselman and Saron Yitbarek, are putting on program this month called, March is for Makers. They normally focus on software, but for this month they are dedicating everything to hardware.
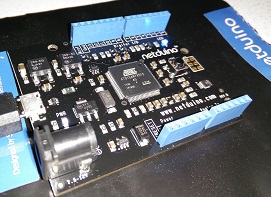
This reminded me of my Netduino 1, which I got for cheap and discovered the reason it was cheap is it was becoming obsolete. It only officially works with Visual Studio 2010, which I never bothered to install after upgrading to Windows 8 and so I haven’t used it for some time.
I thought I could get it working on newer software now that there had been more focus on .Net Micro Framework (progress seemed to have stalled) and the fact that the free community edition of Visual Studio 2013 was the full version and has full support for plugins. After piecing together information from different parts of the web I got it to work.
My initial setup:
- Windows 8.1 – 64 bit
- Visual Studio 2013 Community Edition
- No prior Netduino SDK of Micro Frameworks installed.
- My NetDuino is running the V4.1 firmware
Installation Steps:
- Install the .Net Micro Framework SDK v4.3
- Install the VS2013 Project System from the same location. These instructions will probably work with VS2012 or VS2015 by downloading the appropriate files, but I have not tested this.
- Install the Netduino SDK v4.2.2.0 (64-bit) (direct link)
- Install the Netduino SDK v4.3.1 (direct link)
The main trick that it took me a long time to figure out, was that you have to install both Netduino SDKs. The 4.2.2 has the drivers for the Netduino and the 4.3.1 allows it to work with Visual Studio 2013.
Creating a Project and Testing:
- Plug in the Netduino and it will attempt to install the device.
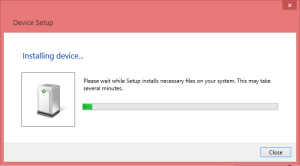
It should find the driver, if it doesn’t have it search for the driver at C:\Program Files (x86)\Secret Labs\Netduino SDK
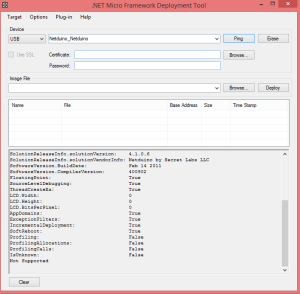
- Next open of MFDeploy, switch the Device to “USB” and the Netduino should be listed. You can ping the Netduino and and get its information by going to the Target menu and choosing Device Capabilities.
- Close MFDeploy and open Visual Studio 2013.
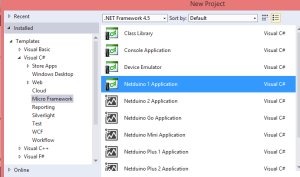
- Create a New Project and choose the Netduino 1 Application
- Open the properties of your project and under the Application section change the Target framework to .Net Micro Framework 4.1 (or whatever version your Netduino is running).
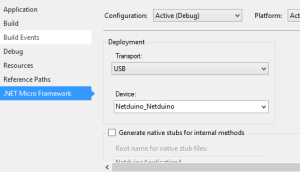
- Under the .Net Micro Framework section make sure the Transport is USB and the Device has your Netduino selected.
- Now you can write code and deploy it the NetDuino. If you need a quick sample to test run this:
using System;
using System.Threading;
using Microsoft.SPOT;
using Microsoft.SPOT.Hardware;
using SecretLabs.NETMF.Hardware;
using SecretLabs.NETMF.Hardware.Netduino;

namespace NetduinoApplication1
{
    public class Program
    {
        public static void Main()
        {
            OutputPort led = new OutputPort(Pins.ONBOARD_LED, false);
            while (true)
            {
                led.Write(true);
                Thread.Sleep(10000);
                led.Write(false);
                Thread.Sleep(10000);
            }
        }
    }
}
This just blinks the led on and off every second. Once it is deployed you should see the LED blinking.
Hopefully this will helps extend the life of the first generation of Netduinos.

